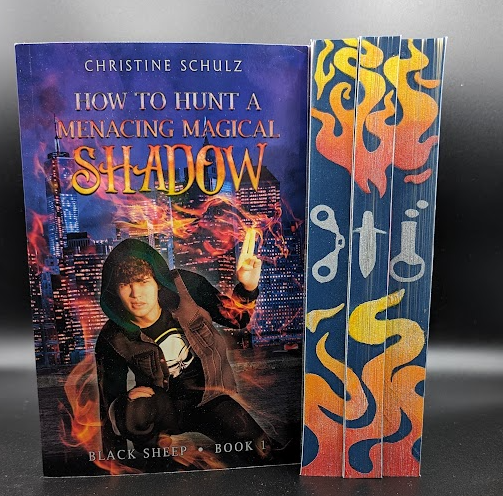
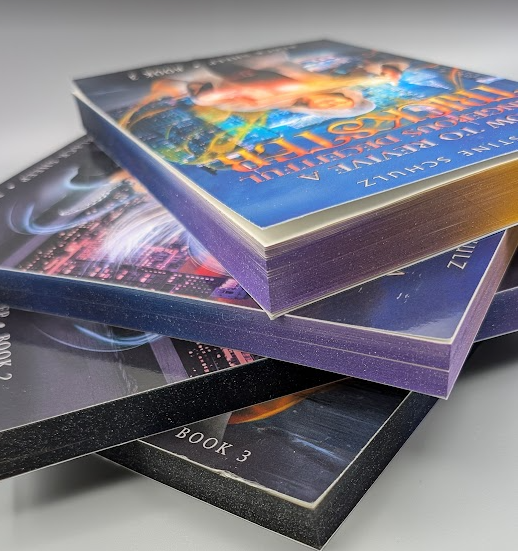
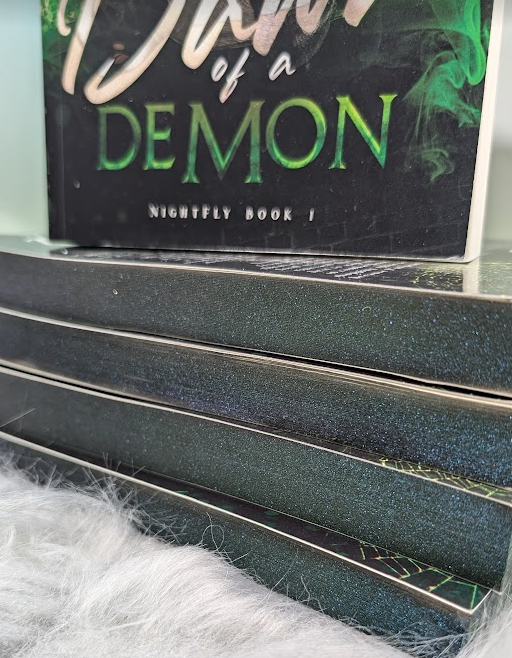
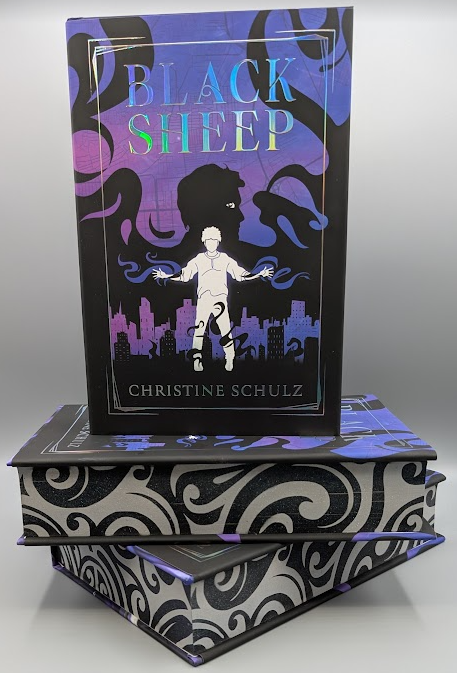
Back in October, I ran a Kickstarter for a special edition illustrated omnibus version of my Black Sheep series. While I could have paid Bookvault, or another service, to spray the edges for me, I decided that to keep costs down, I’d spray the edges myself (ok, I also wanted a fun, glittery design which to my knowledge, isn’t available for small print runs like mine.)
I’ve received a lot of feedback along the way from other authors offering tips from their experiences as well as trial and error of my own. It’s been something a lot of you have been interested in learning about, from both an author and reader perspective, so I decided it would be fun to share my process with you!
The TLDR Version:
- Spraying your own book edges takes time and patience to learn and an initial investment which may not be feasible for some people.
- You will mess up. Buy some books at a thrift store to test first.
- You can use spray paints, but an airbrush will give you a wider variety of colors to use and will go on cleaner.
- It takes a lot longer to do than you think. From setup to clean up, it took me an entire weekend to spray just 10 books.
- Unless you’re a super talented artist, stick to something simple. Don’t get fancy until you start to get comfortable.
Why spray your own edges vs. using a service?
First off, I’m no expert or professional with painting book edges, but if you’re willing to put in the time to learn, here are some ways it can help you:
- If you’re planning a small Kickstarter campaign, just want to sell a few sprayed-edged books in your shop or at an event, or are a reader who wants to add a little upgrade to their book collection, spraying your own edges makes sense. Using a service is usually only realistic for authors needing to order 100+ books and can order their fancy books in bulk.
- There are many small shops/individuals out there who work with authors to sell sprayed edge books to the public. You can buy books directly from their shop, or they may do special orders for specific books (although I can’t imagine it’d be cheap).
- It can be cheaper in the long run, but probably not for a single project. If you’re doing this once, and don’t plan on doing it again, you’ll end up buying a lot of stuff you won’t use for anything else.
- It’s addicting. I’m spraying everything now.
What do I need to get started?
For this project, I’m going to assume you want the fancy designs on your edges. Know that spraying your own comes with it’s limitations. If you want a full on picture, you’ll need to get it professionally printed. However, if you just want a solid color, all you really need is some paint and envelopes to cover the book up.
- Paint: If you’re airbrushing, I’ve had the most success with Createx Colors. It goes on smooth, covers well, but is a bit pricey at about $3.50 per 2 ounce bottle. You can test with regular acrylic paints, but you’ll need an airbrush thinner liquid to thin it out so that the spray gun doesn’t get clogged. If you’re going the spray paint route, I suggest Rust-oleum Matte colors. Make sure it’s matte! Some people can get away with semi-gloss, but it didn’t work for me.
- Cricut (or other similar cutting machine): You’ll need this to cut out the stencil design. This is an investment, but can be used for so many different projects from creating stickers and magnetic bookmarks to cardmaking and foil engraving.
- Airbrush machine: Recommended, but not required. I bought this one from Amazon for about $150, which comes with the compressor, some spray guns, a small paint set, and other supplies. Is it the best out there? Definitely not, but it’s ideal for beginners and those who don’t plan to go crazy with airbrushing projects.
- A book press: You can get crafty here, but you’ll need something to squish the books together so the paint doesn’t run through. I got 2 of these from Harbor Freight. They were super cheap and they fit about 4 (very thick) 6x9in books perfectly.
- Vinyl and transfer tape: Use removable vinyl and a mid-stick transfer tape (nothing heavy duty, it’ll rip the paint off!) I use HTVRONT for most projects. They’re relatively cheap and effective.
- Envelopes: I saw another author offer this idea to cover the books, and it worked fantastic! I bought these Columbian 6x9in. envelopes for my 6x9in. books. They will not fit your 6×9 books as is, so I cut then in half and use 2 because I like my coverings to fit snug.
- The little things: You’ll need to purchase a good set of weeding tools to clean up the vinyl design. I also recommend a good pair of tweezers, a set of small paint brushes designed for detailing and painter’s tape.
Where can I find a design?
Many cover artists are now getting into sprayed edge designs. You can pay them if you want something specific, but for the majority of us, we can create our own with a little craftiness. Canva is a great free tool often used by both readers and authors. I design on the side, so I use Adobe Illustrator and sometimes create my own vector images or I’ll download a stock photo and manipulate it to what I want. The design for my Kickstarter was a stock photo downloaded from Depositphotos and tweaked slightly to fit the space.
First up: Prep the book!
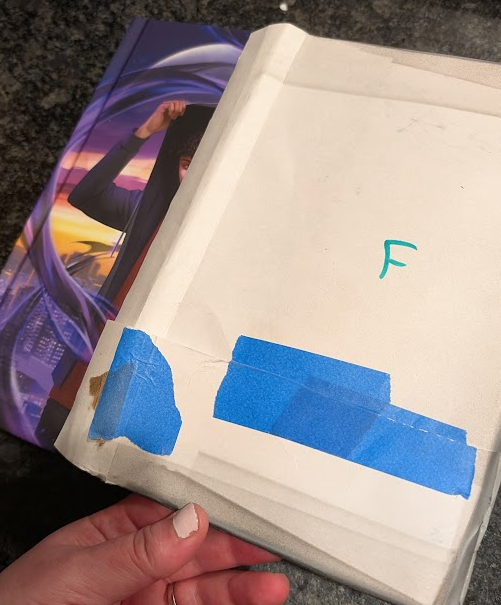
Make sure your workspace is clean. You don’t want to get any nastiness on your cover as you’re wrapping it. To avoid ruining the cover itself, you first need to wrap it. You can wrap it like a package with some craft paper, but envelopes are so much easier. If you’re careful removing them, you can also reuse them a few times. These are 2 6×9 in. envelopes, cut so that they fit snugly over the cover. I then use tape to cover the top and bottom areas where the envelopes don’t reach. If you have a chunker of a book, you’ll also need some newspaper or something to completely cover the spine. I highly suggest labeling the front of the book, right side up. You have no idea how many times I’ve accidentally sprayed books upside down!
Spray the Base Color
The first thing I always do is spray the base color of the book. I start this first because sometimes, I might need a second coat and I always like to fan out the pages to see if anything flakes then let it sit overnight before I apply the vinyl design. The paint does dry pretty quick, but I prefer to let it sit because sometimes I get too itchy and do it too soon.
Pro tip: I had a lot of issues with the transfer tape and vinyl ripping off the base layer paint. To help with this, I spray the base layer with a sealant. I used Aleenes Matte Acrylic Sealer because that’s all my local store had, but Mod Podge and other brands will likely work as well. Just make sure it’s matte and not glossy!
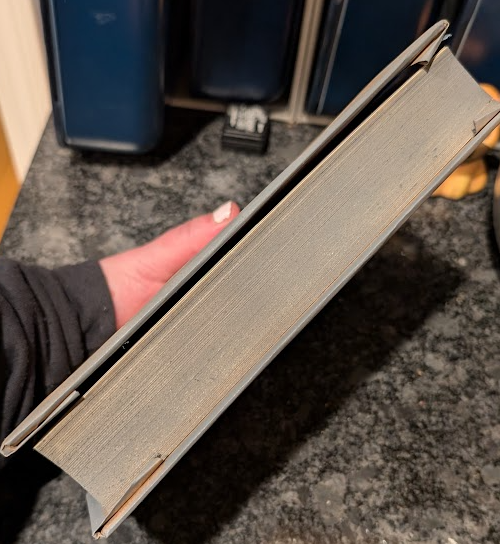
(and this is why we test! The gray came out a lot darker than I originally thought it would!)
Cut and weed. Are we gardening or crafting?
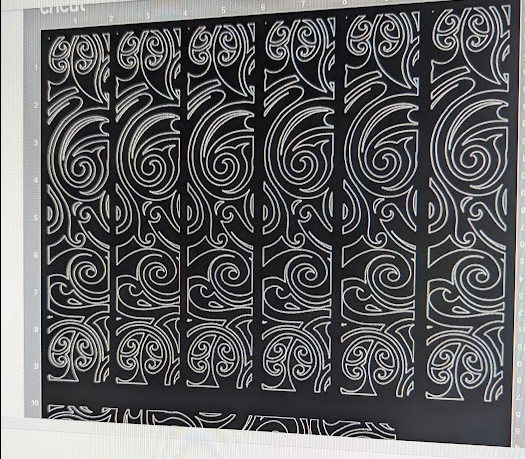
I measured the width of my book and added an extra 2mm because my designs go straight to the edge and I wanted to account for being slightly off when I apply it. With my design uploaded into the Cricut software, I’m ready to start cutting. I use a deep blade for this on the More Pressure setting using Premium Vinyl. Why the extra pressure? I find that with smaller, more intricate designs the regular pressure/blade doesn’t cut all the way through. Even with the deep blade, I’ve never had any issues with it cutting straight through the plastic layering.
Once you have your designs cut, it’s time to start weeding. This is where I recommend starting with a simple design, especially if you’re doing all three sides and multiple books. Mine was a bit intricate, with lots of tiny pieces to cut out. It took me a LONG time to get them all cut and weeded properly. You might also want to invest in a good set of weeding tools and tweezers instead of a cheap set. I ended up with a nasty blister on my middle finger from the tweezers constantly digging into my skin! Remember, what you’re spraying over this will be your top layer of paint, covering the base coat. You may need to reverse it if you want the base color as the design.
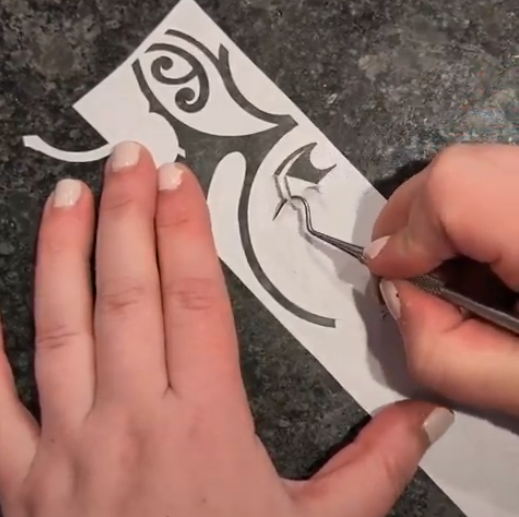
Transfer the Design to Your Transfer Tape
Cut out a piece of transfer tape and stick that bad boy to it! Since I do a lot of craft projects, I used a brayer to roll over it and really make sure it sticks. You don’t need this. Any kind of squeegee, credit card, or even a rolling pin will work. Then slowly remove the plastic backing from the vinyl. Try to align it with the guides on your transfer tape. It’ll be a lot easier when you go apply it to the book. Pull down, not away. If you have a design with multiple elements, you may need to press it down while you peel off the rest of the piece. Worst case scenario, you can use your tweezers to place it back in the right spot.

Transfer the Design to Your Book
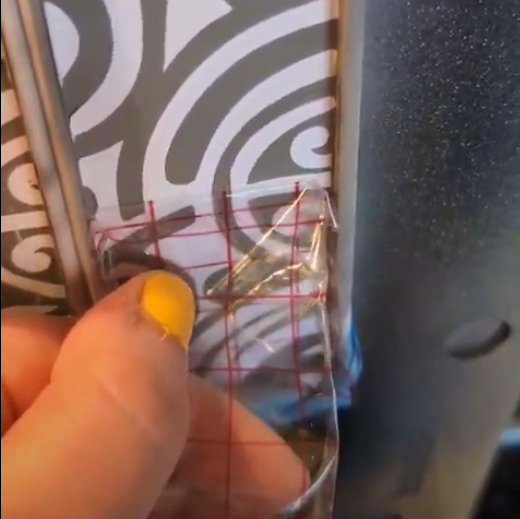
Now take that design you just placed on your transfer tape and align it to your book. Make sure it’s in the right position before you start to press down, because removing it is pretty much impossible without damaging the vinyl or messing up your design. To get it to really stick, use a credit card or something to press across the design. This little guy came with my Cricut. Don’t forget to really get those edges because they like to peel. Get all of your books done before proceeding to the next step. (It’ll make the painting part go a lot faster!)

Then slowly start to remove the tape. Here I am keeping it close to the design and pulling down, not away. You can use your tweezers or other weeding tools to press down on peeling areas if needed.
Get Your Area Ready to Spray!
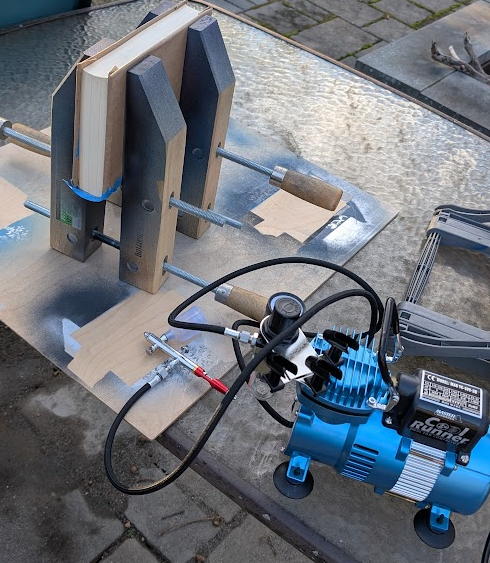
You’ll need to do this outside (or in a garage with the doors open) unless you have a fancy spray booth with ventilation inside your house which I’m going to assume you don’t. 🙂 I bought a cheap throw away tablecloth from the dollar store, then got frustrated with the wind blowing even when I clamped it down, so I ended up just covering my patio table with a big piece of plywood. The paint is acyclic, so it *should* wash off most surfaces, but you don’t want to risk ruining it if you don’t have to. Plug in your compressor, attach the spray gun, fill up the paint cup, set the pressure, and TEST FIRST! Spray it on an old piece of paper to make sure it’s all working good before you accidentally ruin your book. Depending on your sprayer, you might need to adjust the air pressure and spray pattern until you get something you like. Here’s my setup with my test book (before I sprayed the base color).
How do I spray the paint and use the airbrush gun?
Each one is different, so I can’t really tell you how to use it, but for mine I have a little gauge for adjusting the spray velocity and fluid control. Sweep across the book following the line of the paper. You don’t want to go too fast, or you’ll end up with uneven coverage, but too slow and it could build up too thickly. This takes a bit of practice, which is why you should start with a test book before going straight for the real thing.
There are some annoyances I came across. For one, my designs typically needed more than one color, and I had to clean out the sprayer each time I wanted to change it. Since my kit came with a few spray guns, I used both at the same time, but without a quick release connector, I had to unscrew it each time (one of them actually had a different hose all together). They sell splitters and such for this (another added cost), but keep this in mind if your design is using multiple colors. It’s a giant pain in the butt to clean between each use if you only have one airbrush gun, and it can be quite time consuming.
How do I layer the paint?
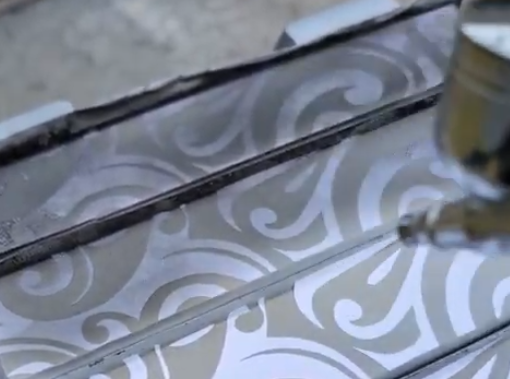
Even with the paints labeled as “primers,” I had a hard time spraying dark colors over lighter ones, so layer your design with this in mind. If you spray your base black, and try to paint a white over it, you’ll probably run into some issues. It’s best to start with a lighter color and layer the darker ones on top of it. Definitely test your design first because even if it does show, the color might not be as vibrant as you hope. Even though an airbrush will create a thinner layer of coat vs. a spray can, I’d suggest keeping the colors to a minimum of three. The paint still builds up and can become quite thick, which will lead to flaking and lots of stuck pages. Not the best of pictures here, but here’s me spraying the black design. Given that I was spraying black, I chose a white vinyl so I could better judge the coverage.
How long should I wait to peel off the vinyl?
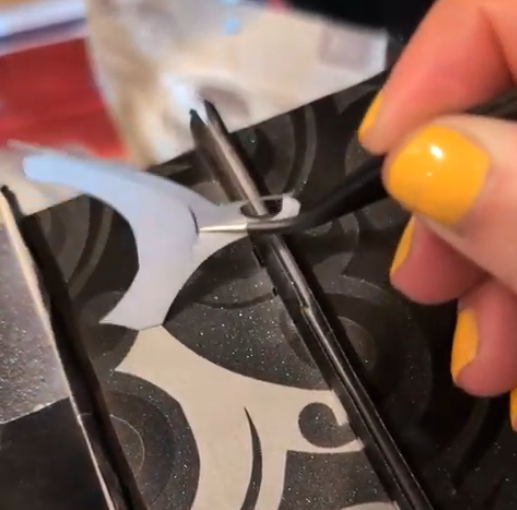
I’m impatient. So I tend to let it sit for about ten minutes, then start peeling off the vinyl. Never had any issues with it. Again, since my designs were quite intricate, this part took me a while. (You might notice some sparkles in this photo…more on in a minute!)
Once you’re done peeling, you might need to do some touch ups. Take your very small detail brushes and THIN THE PAINT BEFORE USING! I mean like, watercolor consistency. I use the airbrush paint thinner that came with the kit. The airbrush uses a very light coating of paint and atomizes it into a spray. A heavy smattering from your brush is going to be a bit darker and thicker. You’ll want to brush this on in light coats to ensure you don’t mess things up by putting on too much paint and not being able to blend it. Once you’re done, give it a minute to dry and fan out the pages.
Only remove the protective covering once you’re sure you’re done. Always check your hands (or wear gloves). You might have paint on your hands, and I’ve accidentally ruined dust covers this way because I wasn’t thinking when I went to put them back on.
To seal or not to seal?
To be honest, I don’t know if this matters? In this example, I used a color shifting spray that somewhat acted as a sealant, but whatever you do, always use a matte sealer. Mod Podge also makes an iridescent sealer that I’ve used multiple times (it also helps hide minor imperfections). Anything glossy will not be your friend.
Get creative!
Since I now have the airbrush, I went to town airbrushing everything! I used the same method to spray paperbacks, which sell so well at book signings that I don’t even bring the non-sprayed edges with me anymore. I attempted a design first, which was a bit difficult to get right across multiple books, then proceeded to just an ombre color with the Mod Podge iridescent finish. Rust-Oleum also makes a glow-in-the-dark spray paint, which I haven’t tried yet but I’m excited to test.
And there you have it folks! This is how I went about spraying the edges of my books. Always check out my Instagram, Facebook, and TikTok because I love sharing photos of all these pretty projects!
